Cable Selection Calculator: Which Cable for Which Job? (UK DIY Guide with No Nasty Surprises)
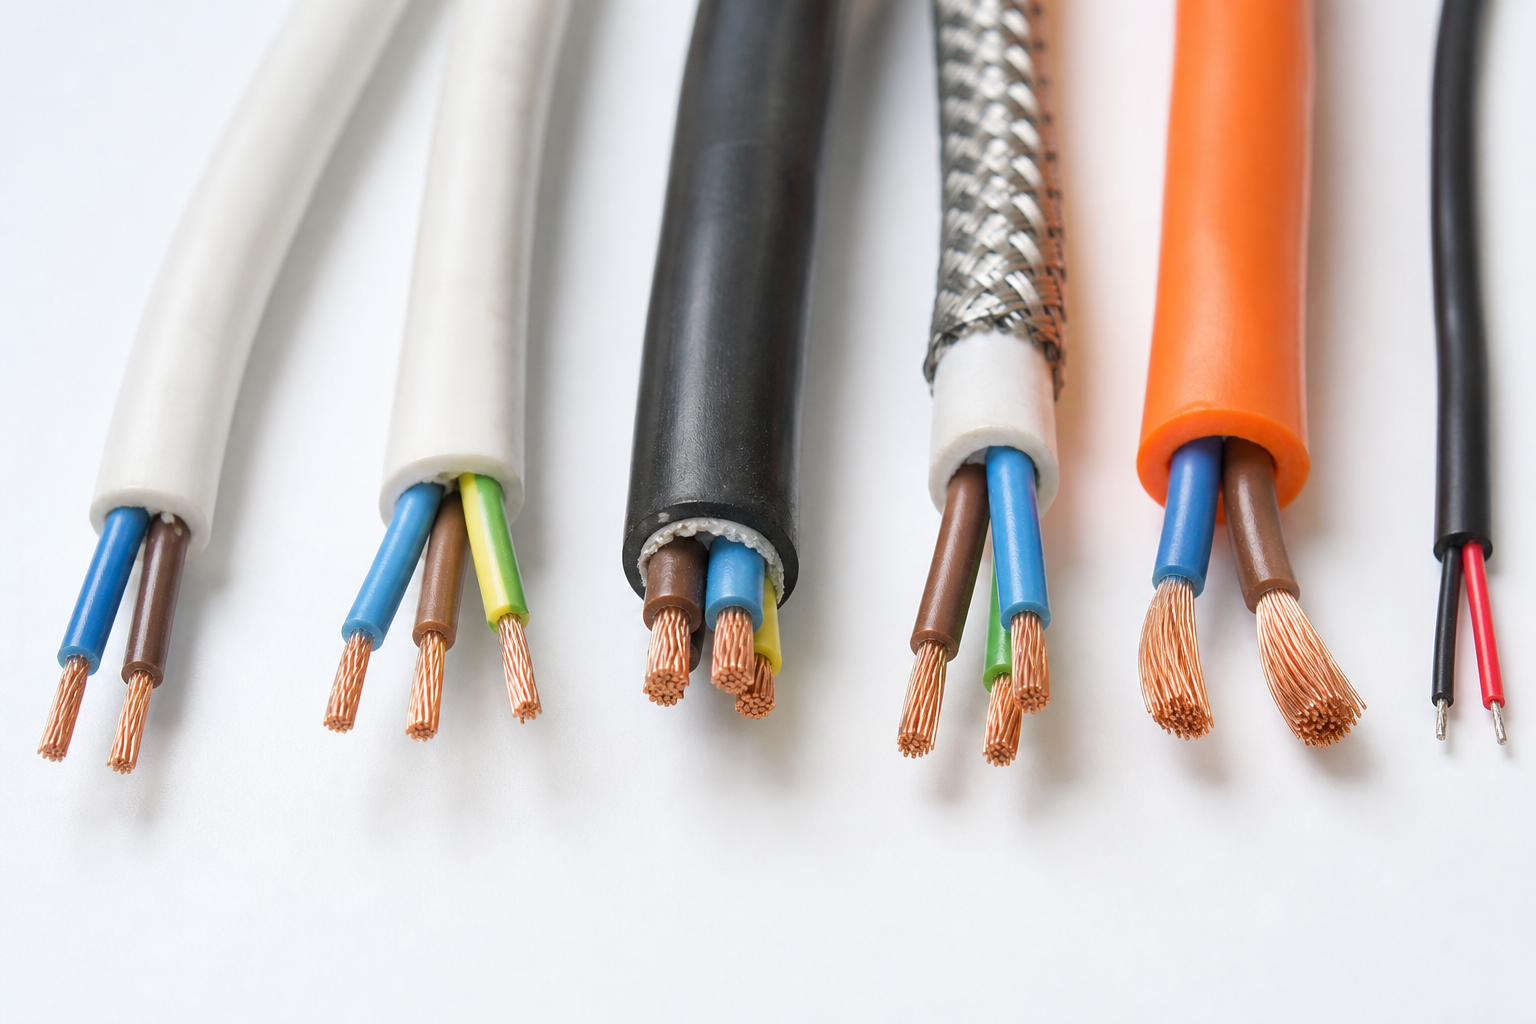
Ever stood in the electrical aisle, scratching your head at a wall of cable reels, and thought: "How thick does this stuff actually need to be?" You’re not alone. Picking the right cable size is one of those jobs that sounds simple—until you realise it’s less like picking apples and more like picking a lock, with safety riding on getting it right.
This guide will show you how to select the correct cable (or wire, for the US crowd) for any DIY job—lighting, sockets, power tools, garden rooms, and even motors. No more buying cable that’s too thin (and risking a meltdown), or so chunky it barely fits the connector. We’ll go through worked examples, cover both metric and imperial (because the world can’t agree on anything), and answer the questions people actually ask—not just what’s on the spec sheet.
Why Cable Selection Matters (and Why Guesswork is a Bad Idea)
Here’s the bit most people get wrong: cable size isn’t about picking the thickest reel and hoping for the best. It’s about balancing safety, efficiency, and cost. Go too thin, and your cable turns into a toaster. Go too thick, and you’ll struggle to fit it, not to mention the cost. It’s like turning up to a paint job with a roller meant for a barn when you’re painting a garden fence—overkill and awkward.
The Main Factors in Cable Selection
Picking the right cable size (diameter or "gauge" in the US) is all about:
- Current (Amps): How much juice will the cable carry? More amps = fatter cable.
- Cable Length: The longer the run, the more voltage you lose. Think of electricity like a tired runner—it slows down the further it goes.
- Type of Load: Lighting, heating, motors—they all have different demands.
- Installation Method: Buried in a wall, clipped to a surface, or run in conduit? Each affects how well the cable can cool itself.
- Voltage (Volts): Most homes are 230V (UK/EU/AU/NZ) or 120V (US/Canada), but always check if you’re doing something unusual.
- Ambient Temperature: Hotter environments need bigger cables, because heat is the enemy of safe wiring.
How to Select Cable Size (DIY Method, No Headaches)
Let’s break it down into steps. It’s not quantum physics, but you do need to follow the logic:
- Work out the current (amps):
- Formula: Current (A) = Power (W) ÷ Voltage (V)
- Example: A 2,400W heater on a 230V supply: 2,400 ÷ 230 = 10.4A
- For 120V (US): 2,400 ÷ 120 = 20A
- Check the cable length:
- Measure the total run (in metres and feet).
- Decide installation method:
- Clipped direct, buried, run in trunking/conduit?
- Allow for voltage drop:
- In the UK, voltage drop must not exceed 3% for lighting (about 6.9V on 230V) and 5% for other circuits.
- For the US, keep voltage drop under 3% for long runs.
- Factor in derating:
- If cables are buried, bunched, or in hot spaces, they carry less current—so you may need a thicker size.
- Pick the next standard cable size up:
- Always round up—nobody ever failed an inspection for using a slightly bigger cable, but plenty have for going too small.
Handy Table: Typical Cable Sizes for Common Jobs
| Application | Typical Current (A) | Cable Size (mm² / AWG) | Max Length (m/ft)** |
|---|---|---|---|
| Lighting circuit | 6A–10A | 1.0–1.5mm² (16 AWG) | 40m (130ft) |
| Socket circuit | 16A–32A | 2.5–4.0mm² (14–12 AWG) | 30m (100ft) |
| Electric shower (7.5kW) | 32A–40A | 6.0–10mm² (10–8 AWG) | 25m (80ft) |
| Cooker circuit | 32A | 6.0mm² (10 AWG) | 25m (80ft) |
| Small motor (1.5kW) | 10A | 1.5mm² (16 AWG) | 40m (130ft) |
**Max lengths are a rough guide—always check voltage drop properly for longer runs.
Worked Example: Sizing a Cable for a Garden Workshop
Let’s say you’re running a supply to a garden workshop. You want to power a few sockets (for tools) and some lighting. Total load: 3,000W (3kW), at 230V (UK/AU/NZ/EU) or 120V (US/Canada). Distance: 30m (100ft) from the house consumer unit.
- Current:
- 3,000W ÷ 230V = 13A
- 3,000W ÷ 120V = 25A
- Cable run: 30m (100ft)
- Installation: Buried in conduit (outdoors)
- Look up voltage drop:
- For 2.5mm² (14 AWG) twin & earth (UK) or NM cable (US), voltage drop is around 18mV/A/m (UK) or 6.4mV/A/ft (US). Let’s check UK first:
- Drop = 13A × 30m × 18mV = 7,020mV = 7V
- That’s just over the 6.9V allowed for lighting, but fine for sockets (up to 11.5V max).
- For US:
- Drop = 25A × 100ft × 6.4mV = 16,000mV = 16V (over the 3% rule, so you’d need to go up a size)
- For 2.5mm² (14 AWG) twin & earth (UK) or NM cable (US), voltage drop is around 18mV/A/m (UK) or 6.4mV/A/ft (US). Let’s check UK first:
- Result:
- For the UK, 2.5mm² (14 AWG) might do for sockets, but 4.0mm² (12 AWG) is safer for this distance and future-proofing.
- For the US, you’d need to jump to 10 AWG (5.3mm²) or even 8 AWG (8.4mm²) for a 25A load over 100ft.
Moral of the story: Always check both current AND voltage drop, or you’ll find your power tools running like they’re stuck in treacle.
Cable Selection Calculators: When to Use One
If you want to skip the sums (no shame in that), a cable selection calculator can do the grunt work. Just punch in your numbers—current, length, installation, etc.—and it’ll spit out the right size. But knowing why it recommends a certain cable means you’ll never get caught out if something changes on site.
Common Pitfalls (And How to Dodge Them)
- Mixing units: Measuring the run in feet but picking cable size in mm² is like buying shoes in size 10 but socks in centimetres—never ends well.
- Ignoring installation method: Cables bunched together or buried get hotter than a kettle left on. Always allow for this.
- Rounding down: Always round up to the next size. Cable doesn’t shrink, but your margin for error will.
- Neglecting future-proofing: If you might add more sockets or bigger kit later, size up now. It’s cheaper than running a new cable next year.
Questions People Are Actually Asking
How much cable size?
"How much" usually means "what size"—so, what cross-sectional area (in mm² or AWG) do you need for your job? Use the current, cable length, and installation method to work it out, then round up to the next standard size. See the steps above or try a cable selection calculator for speed.
How many cable size?
If you mean "how many different sizes of cable are commonly used?"—there are a handful for most homes: 1.0mm² (18 AWG) and 1.5mm² (16 AWG) for lighting, 2.5mm² (14 AWG) for sockets, and 6.0mm² (10 AWG) or up for showers and cookers. Commercial or heavy-duty jobs use even beefier stuff.
How to select cable size?
Work out the max current the circuit will carry, measure the run, factor in voltage drop and installation method, and choose the next standard size up. Don’t forget to check local rules—UK and US code differ.
How to cable size selection?
It’s the same as above: calculate load (amps), consider length and installation, check voltage drop, and pick a cable that can safely handle it all. If in doubt, use a cable selection calculator or ask a qualified electrician.
How to cable size calculation?
- Find the current: Amps = Watts ÷ Volts.
- Look up the cable’s amp rating for your installation method.
- Check the voltage drop for your length.
- Round up to the next size.
- If burying or bunching cables, allow for derating.
How to size cable tray?
Add up the total cross-sectional area of all the cables the tray will carry, then pick a tray with at least 20% spare space for airflow and easy installation. In metric and imperial: measure cable diameter, work out area (πr² or via manufacturer tables), total it up, and pick your tray size based on the sum.
How to size cable for motor?
Motors have high starting currents, so always base your cable size on the max full-load current plus a margin for start-up. Check the motor plate for amps, allow for voltage drop, and pick a cable that can handle both the running and starting loads, using the usual calculation steps.
How to size cable gland?
Cable glands (the connector at the end of the cable, also called a "cord grip" in the US) are sized by the cable’s outer diameter. Measure the cable’s OD in mm (or inches), then pick a gland with a matching clamping range. Always check the manufacturer’s chart—don’t guess!
Conclusion: Don’t Let Cable Sizing Trip You Up
Cable selection isn’t glamorous, but it’s the difference between a job that’s safe and one that’s asking for trouble. With a bit of maths, a cable selection calculator, and the tips above, you can get it right first time—no melted insulation, no angry inspector, and no need to rewire because you bought the wrong size on a Sunday.
Still unsure? Use a cable selection calculator to double-check your numbers, or ask a qualified spark if you’re tackling anything beyond your comfort zone. Better safe than tripping the breaker every five minutes.
Free tools to put this into practice
Reading is one thing — working out your own numbers is what saves time and money. Here are the free HowMuchDoINeed calculators that pair best with this guide:
- Flooring Calculator Guide How Much Flooring Do I Need Complete Uk Homeowner Diy Guide — work out exactly how much you need and what it will cost.
- Concrete Calculator Guide How Much Concrete Do I Need Complete Uk Diy Construction Guide — get an instant materials estimate for your project.
- Paint Calculator Guide How Much Paint Do I Need Complete Uk Diy Decorating Guide — size up quantities and costs before you head to the merchant.
- Wall Stud Spacing Uk Standards Diy Tips — plan your order so you avoid over- or under-buying.
Explore every free calculator on HowMuchDoINeed — no sign-up required.